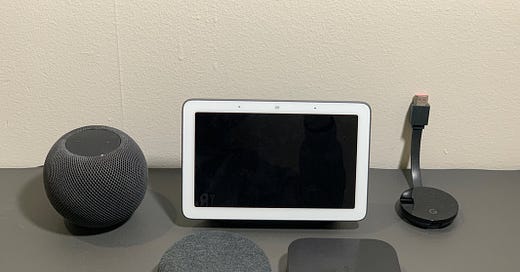
How to use HomeKit devices in ANY dorm or hotel: A comprehensive guide
Brady Snyder
If you've ever stayed at a hotel, dorm, or apartment and brought your smart devices along, you know this situation. The network either has WPA2-Enterprise protection, meaning you have to enter a username and password, or it has a captive online portal, meaning you have to open a restricted webpage to be granted access. Most smart devices, including an assortment of devices from Apple and Google, have no interface to interact with these networks, rendering them functionally useless.
A quick google search, a peak on Apple's Developer Forums, or a long road down Google's support research will provide no answer to this problem. Thankfully, there IS a solution, and it only requires a mobile device for the setup process and a computer.
A few quick caveats to note:
This process does not change the fact that WPA2-Enterprise networks do not support Peer-To-Peer Networking, meaning that some features will not work as expected, or at all. The only way to change this is to setup your own router, which is prohibited in most enterprise workplaces, so it won't be discussed further.
This guide will focus on how to setup HomePods with the use of a Mac computer. Any computer can be used to do this with any HomeKit device. You will need to follow the steps as described and find similar commands in your respective operating systems.
Setting up a HomePod on a protected network
Apple
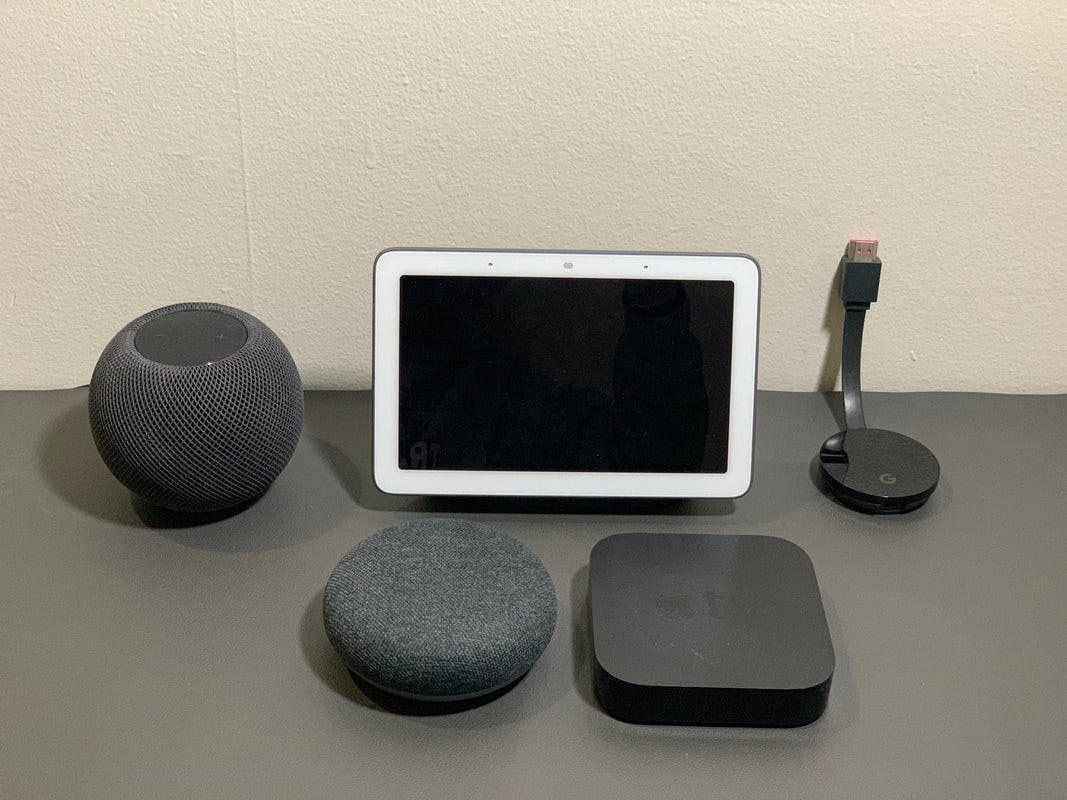
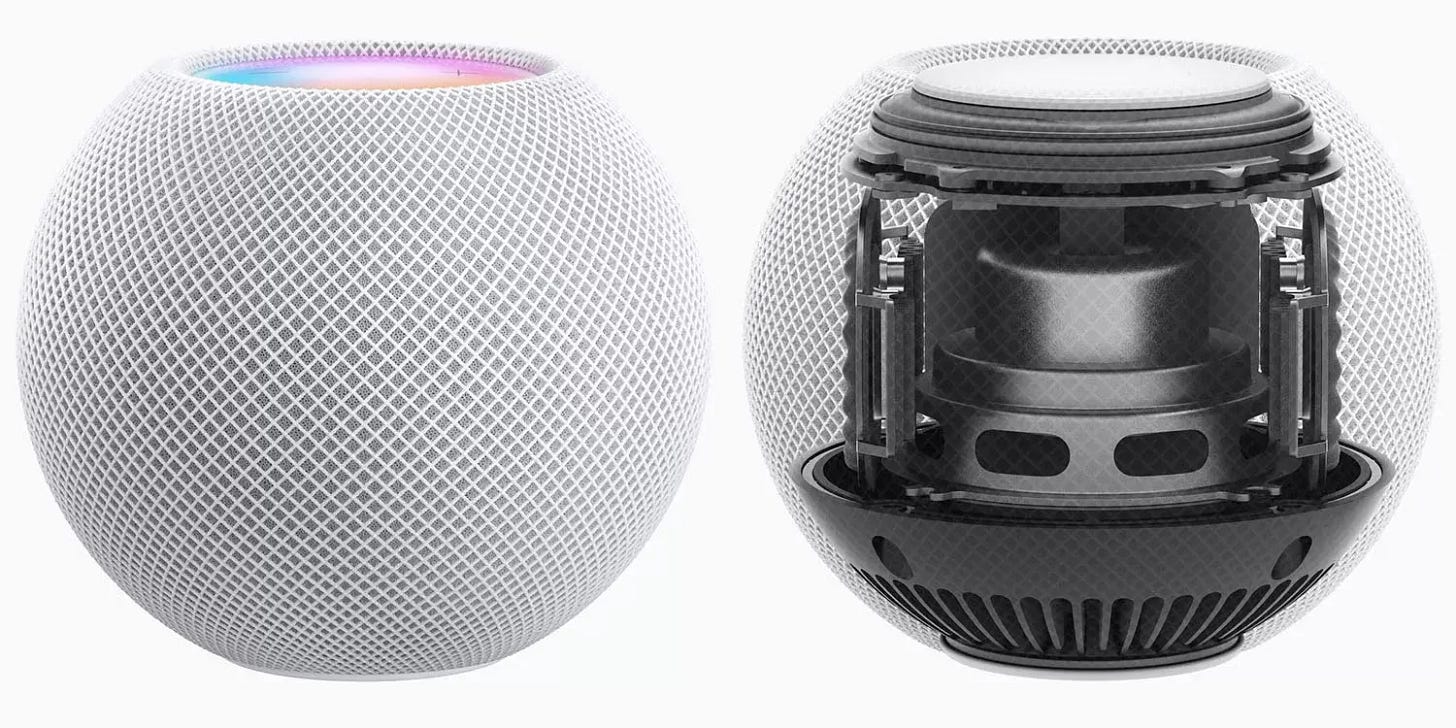
This portion of the guide will cover how to set up a HomePod. The guide was creating using the iPhone XS Max on iOS 14.4, the HomePod mini, and a MacBook Pro running Big Sur—but will work on any combination of HomeKit, iOS, and OS X/MacOS devices.
To begin the setup process, bring your iPhone near the HomePod. Make sure that your phone is connected to the WiFi network you plan to connect your HomePod to. Next, connect your HomePod to wall power.
Brady Snyder
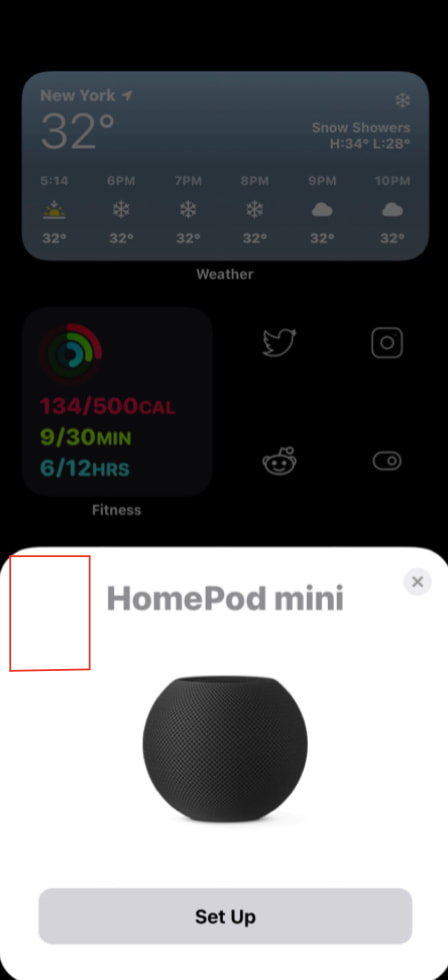
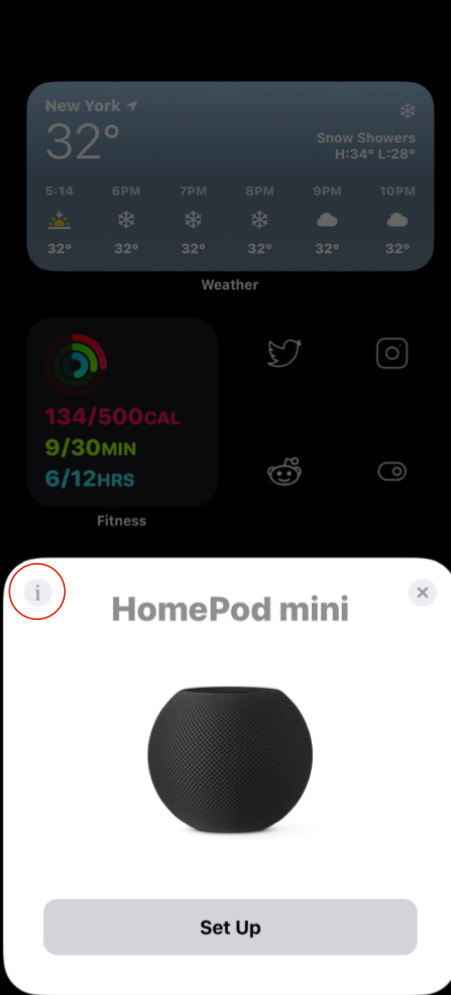
Once you have unlocked your iPhone in range of your HomePod, the setup bubble will appear on your Home Screen. Tap the upper left portion of the setup bubble until an 'i' button is revealed.
Brady Snyder
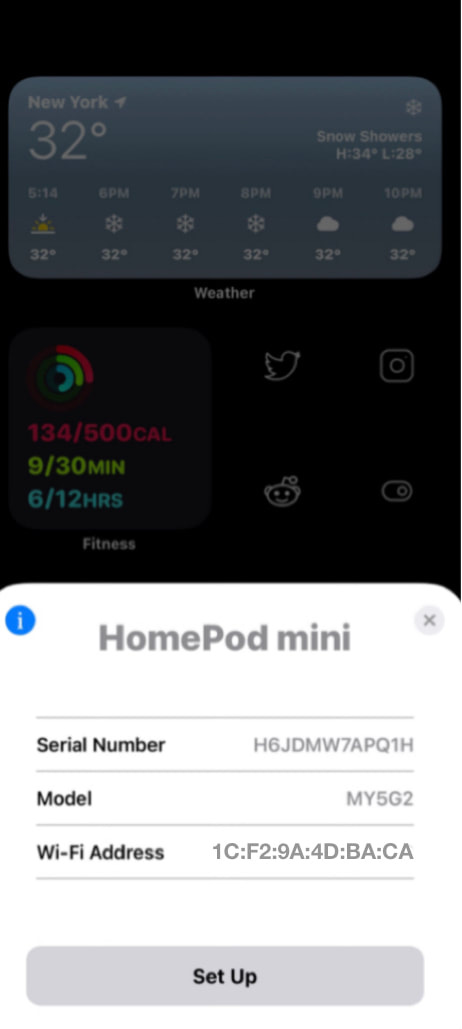
Once the 'i' appears, tap on it to reveal your HomePod's hardware information.
Brady Snyder
The setup screen will now show your serial number, model number, and WiFi address. The WiFi Address is more commonly known as a MAC address, and it will be referred to as such throughout this guide. Take a screenshot of it, write it down, or add it to the notes app in your Mac computer—or all of the above. This address is crucial to using your HomePod on your network. DO NOT press the 'Set Up' bubble until you have completed the steps in this guide.
Using your Mac to approve your HomePod
Essentially, to make a smart device work on a protected network, you must "disguise" your Mac as the device and sign in with your credentials. This involves some very simple command lines, and can be achieved in just a few steps.
First, start up your Mac. You'll be looking for the WiFi symbol in the Menu Bar.

Brady Snyder
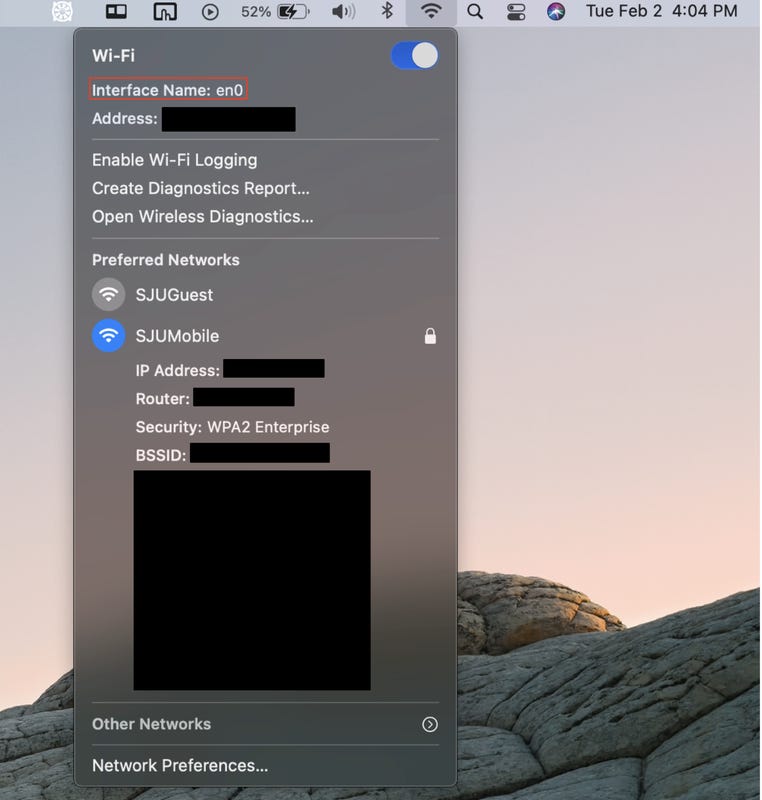
Press and hold the option key while clicking on the WiFi symbol in the Menu Bar. This will open a longer dropdown menu.
Brady Snyder
Take note of the 'Interface Name' located at the top of the WiFi menu window. On my MacBook Pro, the WiFi interface name is 'en0'. On Macs with Ethernet, Thunderbolt, or FireWire network capabilities, your interface name could be any name from en0-en3. You will need this interface name for a command line later in the guide.
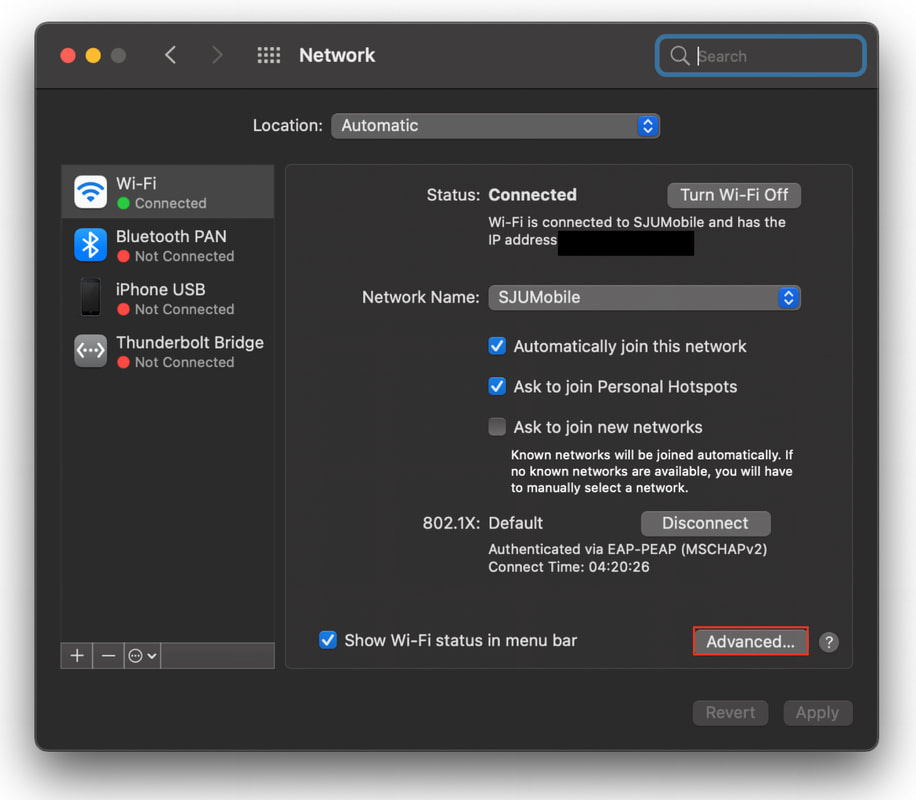
At the very bottom of that same WiFi window, there will be an option to 'Open Network Preferences.' Select that option, and a System Preferences window will open automatically.
Brady Snyder
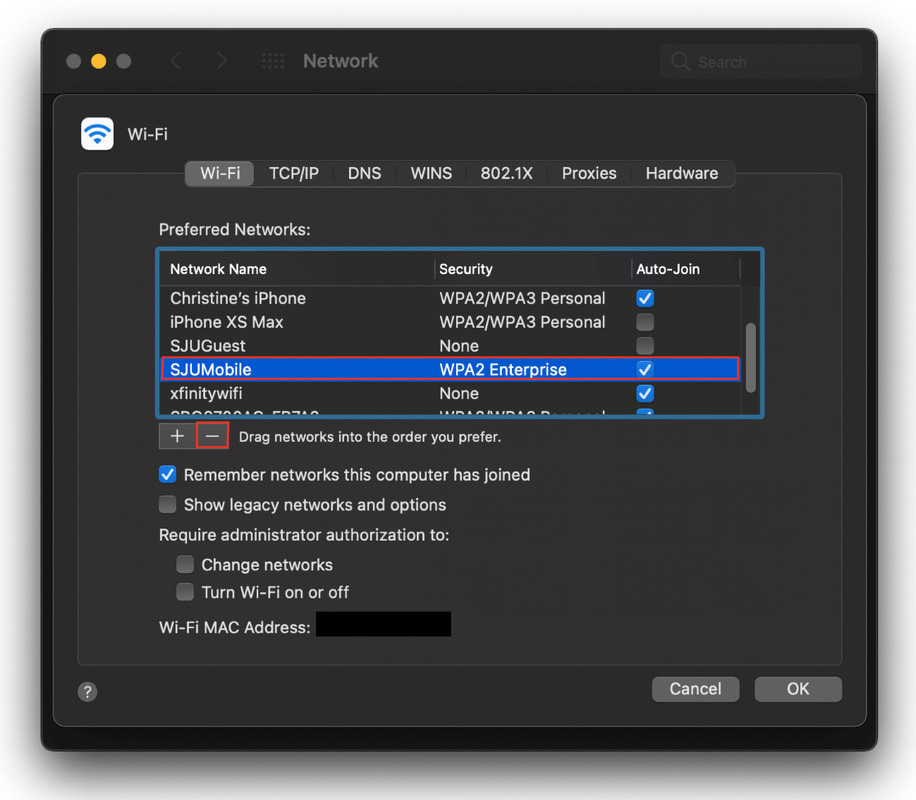
Click on the 'Advanced' bubble at the lower right of the window.
Brady Snyder
You'll be presented with all of the networks you have connected to with your Mac. Find the network you want to connect your smart device to and click on its name. The entire network name should be illuminated in blue; in my case, SJUMobile is highlighted in blue. You will then click the '-' button directly below the list of networks. This will disconnect and forget the network; you will need to re-enter your credentials later. At this point, it is best to turn off WiFi completely.
Using Terminal to 'disguise' your Mac's MAC address
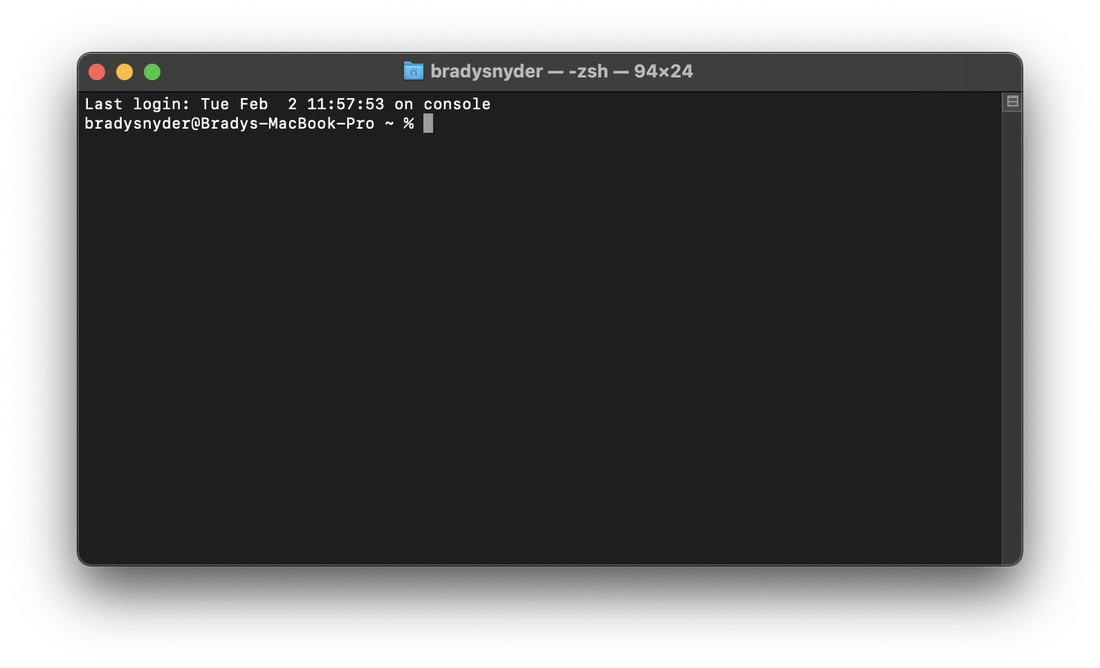
Terminal is just a program without a graphical user interface, so all commands are entered via text. It'll look a bit intimidating at first, but if you know exactly what commands to enter (below), it's as easy as typing on a keyboard.
You can launch Terminal in the following ways:
-Find Terminal in your computer's Applications folder
-Press Command, F to open a finder window; search for Terminal; open the application
-Press Command, SPACE to open Spotlight, search for Terminal, press the return key.
When Terminal is open, it'll look like this: (will vary based on OS X/MacOS software version)
Brady Snyder
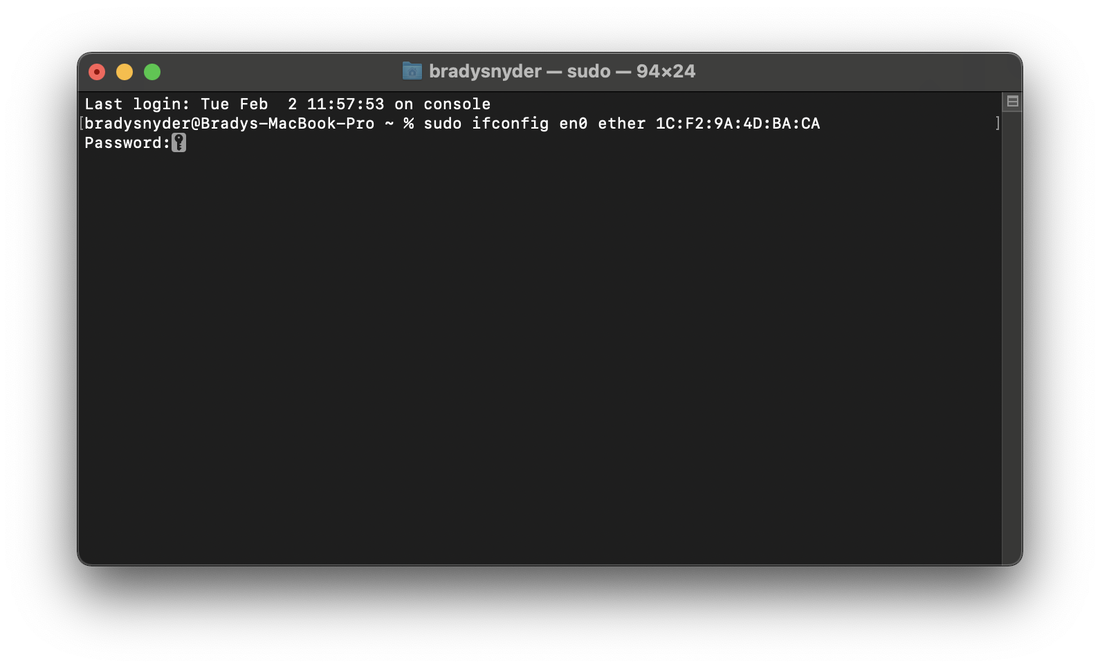
Once terminal is open, enter the following command. Input your computer's WiFi Interface Name and your smart device's MAC address into the command line.
sudo ifconfig <Interface Name> ether <MAC address>
Brady Snyder
Enter the command line with your interface name and MAC address added. Use the screenshot above as an example. Once you have typed the command correctly, press the return key to run the command.
Note: You will need to enter the password to an administrator account on your Mac in order to run any 'sudo' command lines.
Brady Snyder
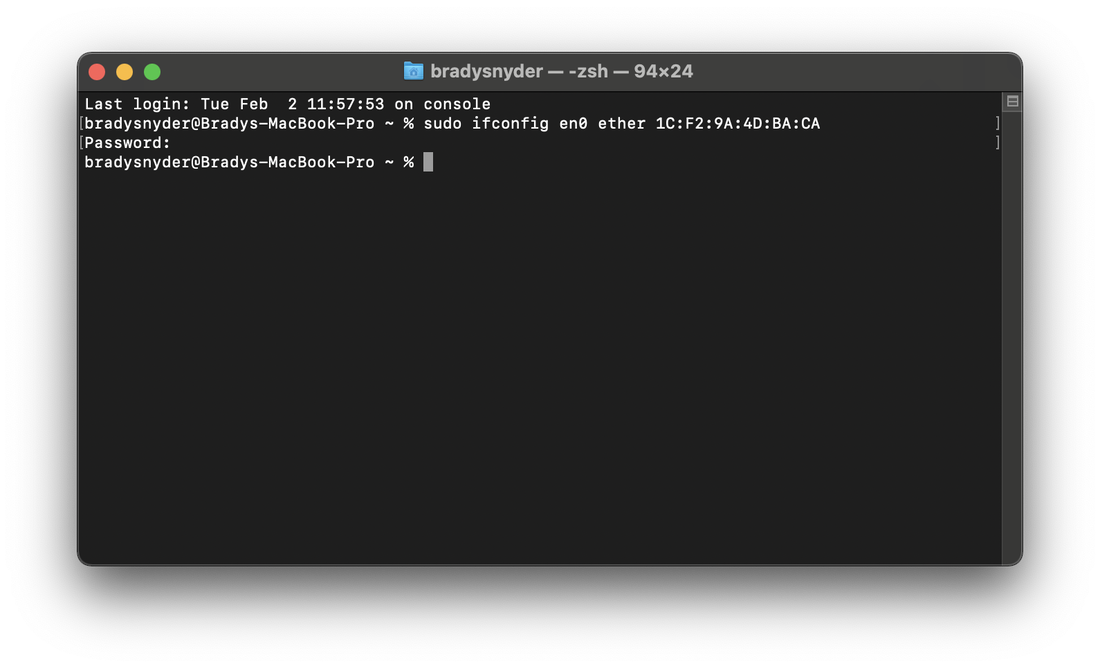
If you've successfully ran the command line, you will see a new, blank command line under the 'Password' prompt. In my case, 'bradysnyder@Bradys-Macbook-Pro ~ %' lets me know that my command ran without any errors.
Reconnecting your Mac to WiFi
Now that your Mac has forgotten your network and appears to have the MAC address of your HomePod, it's time to reconnect to your WiFi.

Brady Snyder
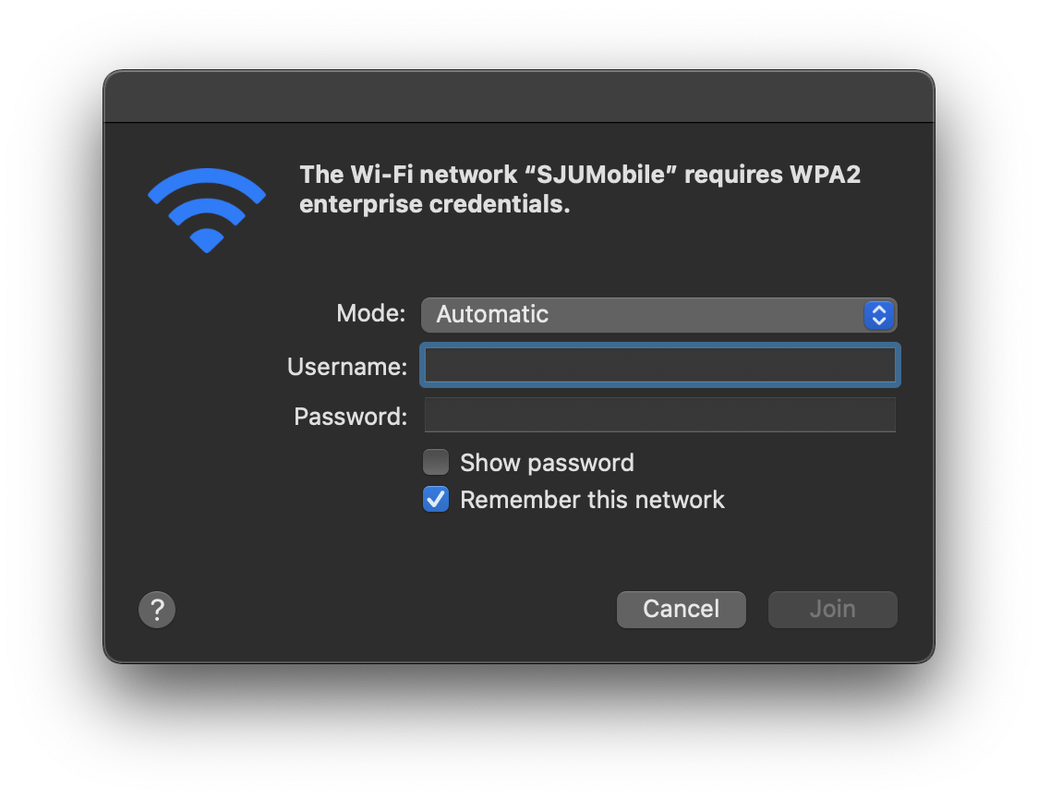
Click on the WiFi icon in the Menu Bar, and a list of your available networks will dropdown in a new menu. Select the network you want to connect your HomePod to.
Brady Snyder
After selecting your network from the menu, a window will appear asking for your WPA2-Enterprise credentials. Enter your credentials to approve your HomePod on the network.
Finishing the setup process
The first thing you'll want to do to finish setting up your HomePod is to restart your Mac. Since you changed your MAC address to match your HomePod's, your HomePod will not be able to connect to WiFi since your Mac is using the same address. Simply restarting your Mac will revert its MAC address to its original address.
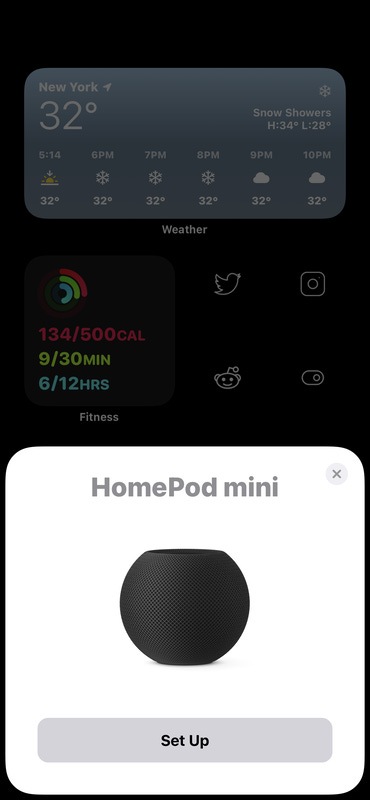
After you've restarted your Mac, make sure your iPhone is connected to the same WiFi network you will use to set up your HomePod. Then, bring your unlocked iPhone near your HomePod and the setup bubble should return.
Note: If you can't get the setup bubble to return, lock your iPhone and walk away from the HomePod for a few minutes. Then, bring your phone within a few inches of the HomePod and unlock it. The setup bubble should return.
Brady Snyder
Simply press the 'Set Up' prompt and continue the setup process. The following settings are personal preference, though selecting 'Do Not Use Personal Requests' has been found to improve performance.
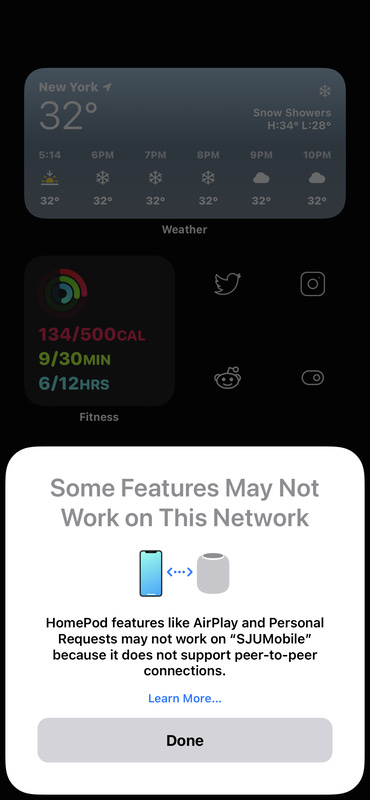
The HomePod may load for *a while* but after setup is complete, you will be greeted with a "Hello" from Siri and this message:
Brady Snyder
This message simply informs you that since WPA2-Enterprise networks do not support peer-to-peer connections, some features won't work properly. I've found that Personal Requests do not work, but AirPlay 2 works perfectly fine. You can even pair two HomePods in stereo on a WPA2-Enterprise network.
Press 'Done' and your HomePod is ready to use!
Conclusion
Though many HomeKit, Google Nest, and other smart home devices lack WPA2-Enterprise support, this guide offers a way to connect to a protected network despite a lack of support. This guide was specifically made for Apple's HomePod, but will work with ANY smart home device provided you can access its MAC address.
Tried this guide? Have a question or suggestion? Leave a comment below!


